Do you Ipsy?Do you Ipsy? Do you know what Ipsy is?
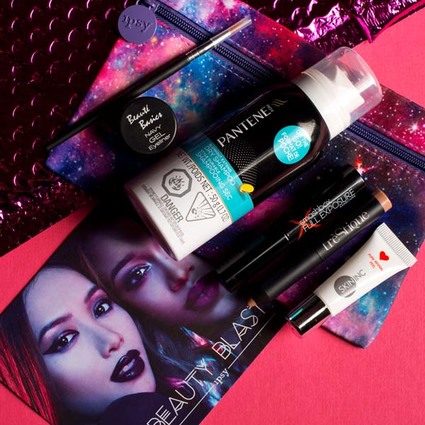
Well, Ipsy is a monthly beauty subscription that sends you 5 beauty "samples" each month for $10. Why do I Ipsy? Well, for photo shoots it's great to have all sorts of available products for clients at their disposal. And it's fun to get a cute little hot pink packet every month with new things to try! This months Ipsy included: Pantene dry shampoo Beauti Basics Navy gel eyeliner and Eyeliner brush Smashbox full exposure mascara Skin Inc Pure Revival Peel tre'StiQue Mini Matte Lip Crayon in Nantucket Nude What I love about Ipsy: You get a cute packet in the mail full of goodies! I can use all of the items either personally or professionally. It's a great little treat for myself each month. What I don't love about Ipsy: I received a "mass produced" or traditional product this month... something from Pantene. I don't use these sort of mass products so it will go in the studio box for client use. I otherwise LOVE getting my hot pink packets in the mail each month! I love getting these so much that I've now also subscribed to Birchbox. And I'm most likely going to subscribe to Vegan Cuts for a vegan and cruelty free option as well. Here are the links to check out these services for yourself! It's like Christmas 3 times a month! https://www.ipsy.com/glambag/ https://www.birchbox.com http://vegancuts.com/beautybox I'll write more about the subscriptions and compare all 3 for you next month! This would make a GREAT gift for your sister, mom, or anyone in your life who enjoys a new surprise lippie or two! Birchbox also offers a subscription for the man in your life! Let me know what you think of your subscription or if you think there's one I should check out!
0 Comments
Doing your own makeup for a photoshoot?Check out the ladies below and their YouTube channels for tutorials on proper application and products that they have tested before you run out and replace your foundation.... Lauren CurtisI think I have a weak spot for anyone who speaks english without a midwestern accent.... You betcha. Beyond her super fun accent I really like how "real" Lauren Curtis is. Great tutorials include an interactive Facebook profile that you can request trendy and celebrity looks on! Check her out! Makeup Game On PointI wish I knew her name... cause she's hilarious! This video had me cracking up. Not only that but she gives good advice on products including drugstore finds and up to date trendy look tutorials. Kandee JohnsonKandee was the first MUA vlogger that I discovered on youtube. I really like her personality and she's incredibly talented on top of it! She's my "go to" for inspiration for more costume style tutorials. She's got a lot on her channel so check her out! Bonus tutorials: Kat Von D for SephoraI love Kat Von D's tutorials. Granted she sells makeup now... but I thought I had to include her for all the rocker girls... since I have a rocker girl. I haven't used any of her palettes yet but I'm tempted to buy a couple because the colors are so fun. I am a sucker for deep jewel tones.
If there is a Makeup Vlogger that I you think is great or that I missed comment please with their name so I can check them out! Happy makeuping! Elle I know that summer is winding down, but the damage from the fun in the sun is probably adding up and your hair is showing the effects. I'm going to share a couple of my favorite Summer Hair Hacks to have your hair on it's way to looking it's best again!
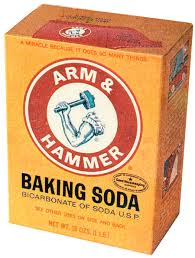
Dry frizzy hair? Want some shine back? It's no secret that I'm obsessed with coconut oil. I use it for everything. Yes, everything... even a hair mask. Coconut Oil Hair Mask What you'll need.... Coconut oil, preferably organic blah, blah, blah. And a shower cap. After showering (at night, I just rinse my hair prior to application shampooing is not necessary) place anywhere from a teaspoon to a tablespoon (or more depending on length and texture of your locks) in your hands and melt. Quickly work through your damp hair from root to tip. Once applied wrap up your hair in a bun and cover with a shower cap. Leave on over night, shampoo and condition as normal and voila! Super shiny and conditioned hair. The mask should be applied every one to two weeks for maximum benefit. Natural, and inexpensive! Smells super summery too! Green pool hair? Don't cut it! Use a little baking soda and it will come right out! I've also used this baking soda trick to take out Manic Panic that is faded or even demi and semi permanent hair dye. Baking Soda Chlorine Remover Simply wet hair and add 1 tablespoon of baking soda to your USUAL amount of shampoo. The mixture will be paste like. Wash your hair with the mixture, and let sit on your hair for 10 minutes. Repeat. Only do this twice. You don't want to completely strip the natural oils out of your hair. I recommend a good conditioner after (maybe the coconut oil treatment) and if you still have a tint of green in your hair wait a good 24 hours before using baking soda on it again. I've used this to strip out demi and semi permanent hair color so it should greatly reduce the green tint from too much time at the pool! Want that sexy beach hair? You know... sea spray looks good on you girl. I'm land locked though! No beach for 2,000 miles so what does a girl do? Spend $16 on a designer spray? That's crazy talk. Beachy Wave Hair Spray What you'll need: 1 cup hot water 1 tsp sea salt 1 tsp coconut oil 1 tbsp hair gel 1 tbsp hair conditioner (optional) Recycled spray bottle Instructions (it's not complicated I swear) Dissolve the sea salt in the hot water. Add in the coconut oil and hair gel, mix well. Add in the hair conditioner (optional) Whisk and blend together well, pour into a spray bottle. Shake well prior to applying to hair and be transformed into one of those red swim suit wearing hotties dashing through the sand with great hair! If you're like me you don't blow dry your hair in the summer. I am a "wash and wear" kinda gal when the temperature passes 80. I do love to throw my wet locks up into a bun and allow it to dry naturally. At night I take it down for PERFECT waves that are sexy and frame the face. And my hair smells amazing at the same time. I don't have to worry about breakage as I drive with the windows down and my hair typically grows a lot with the extra care I give it in the summer. My last and final hack for your summer hair style is to FLIP your bobby pin. Yep, flip it over - put the bumpy side down and it will grip your hair so that your wet hair will hold as it dries in your fancy bun. As always if you've got some summer hair hacks of your own, share with me! I'd love to hear them! Natural Remedies for common skin issues
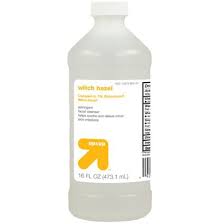
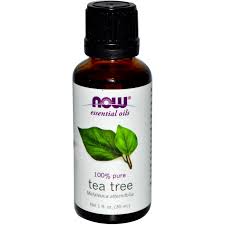
rendering process that takes more than a couple of steps to create your favorite voodoo tonic, I recommend skipping that treatment and trying something natural first. Worst case scenario you go back to your expensive creams. Natural remedies: Witch hazelIf you've never heard of Witch Hazel it is a natural astringent or skin toner made from the Witch-Hazel plant and its leaves and bark. It was used by the Native Americans for its healing properties and is used for treating skin irritation, redness, swelling, swelling of the eyes, and bruising as it balances the PH of your skin without over drying as it locks in moisture. I recommend soaking a cotton ball or square with Witch Hazel and applying it after cleansing both day and night. You'll see any residual dirt or make-up removed after cleansing, and it will heal the redness and any dryness on the face, neck and decollate. I also use it on fresh tattoos as it helps reduce both swelling and redness while soothing. Witch Hazel is widely available in both brand name and store brand varieties. It is often sold in the pharmacy area of your favorite mega store or grocery chain. Look for where you would also purchase rubbing alcohol or peroxide and there should be at least a couple of options for you to choose from. The average purchase price for 16oz's should be about $1.60 depending on what area of the country you're looking to buy. You should also find Witch Hazel at your local health food store or co-op. One bottle of Witch Hazel lasts me about 60 days and I also use it to make a natural eye make-up remover. Here are some more uses for Witch Hazel: http://www.webmd.com/vitamins-supplements/ingredientmono-227-WITCH%20HAZEL.aspx?activeIngredientId=227&activeIngredientName=WITCH%20HAZEL Natural Remedies: Tea Tree OilTea Tree Oil is what it sounds like, an oil made from the leaves of the Tea Tree. It is often used to treat a variety of skin aliments. While it's not recommended that you ingest Tea Tree Oil, it is used to treat tooth and mouth infections so we're still okay with our beauty rule of thumb. Specifically you can use Tea Tree Oil to treat acne, ingrown hairs, cold sores, and allergic reactions. It needs to be diluted for proper application with another oil such as olive oil, avocado oil, or grape seed oil. The recommended dilution level is 5%. A good rule of thumb is 2 drops of Tea Tree Oil per 2 Tablespoons of Olive Oil. You can store your mixture in a small jar, and apply with a cotton swab directly to any acne break outs or skin irritations. This mixture can also be used to heal "strawberry legs" or ingrown hairs. Use it instead of your moisturizer after shaving, twice daily until the problem areas have healed. Tea Tree Oil can be found at your local pharmacy and in some cases your favorite mega mart store in the vitamin isle. It will most likely run you about $11-$12 for a 1-2oz bottle. That sounds expensive, but you're only using a couple of DROPS to make a couple of weeks worth of spot treatment. Again depending on how many areas of the body you're treating a bottle of tea tree oil will last me several months. If you're concerned about budget for this item stay away from the health food stores and co-ops, I've noticed in my area that they charge a couple of dollars more than the pharmacy chains. I also use Tea Tree Oil to make my all natural, biodegradable multi purpose house cleansers. It smells wonderful and cleans and disinfects. I'll be sure to post that recipe soon. For more information and uses of Tea Tree Oil: http://www.webmd.com/vitamins-supplements/ingredientmono-113-TEA+TREE+OIL.aspx?activeIngredientId=113&activeIngredientName=TEA+TREE+OIL&source=2&tabno=2 Natural Remedies: Baking SodaI bet you just thought I was crazy when you read "baking soda" for your face as a natural beauty treatment. But if you aren't aware of the many uses of baking soda, allow me to enlighten you. Baking soda is the best natural exfoliant around. It's inexpensive, readily available and doesn't rip or tear your skin when used as an exfoliant. You only need to mix baking soda with water to make a paste to use for the entire body. It also helps alleviate ingrown hairs, and soften your bath water. I use baking soda for everything. Cleansing the sink, toilets, as a water softener and fabric softener, for heartburn (my favorite use by far) and for an exfoliant. Baking soda is SO CHEAP! And it's so good for such a large variety of uses that I purchase it in bulk. I'll go more in depth on the wonderful things you can use baking soda for in another dedicated post but for today I want to stress that if you're breaking out try exfoliating twice a week with baking soda paste and see if that doesn't expedite the skin healing process. For more information and uses of Baking Soda: http://en.wikipedia.org/wiki/Sodium_bicarbonate As always if you have any questions in regard to the content of this post please comment. If you like the information please share! Elle
instantly take the years off Chelsea Chelsea There are just 6 simple things you can do to ensure your make-up isn't actually aging your face or appearance in photos. A lot of my clients opt to do their own make-up for their portrait sessions, follow these tips to get maximum impact from your beauty products. 1) Shimmer shadows. Chelsea to the left has on a gold tone shadow that only extends to the crease. This highlights her eye without overwhelming her face. Full shadow application in high shimmer or pearl colors only make you appear older if the shadow isn't properly applied with a good base and falls into the fine lines around the eyes. 2) Loose Powder. I'm not sure why anyone would use colored loose powder anymore. Not the kind you push into the pores of the face with a fancy Japanese brush but you remember... the kind that you would just dust over your thick chalky foundation? This really adds the years to the face. To set your concealer or foundation try a very light dusting of translucent "photo finishing" powder to ensure that your make-up stays on through your portrait session. Better yet is to get a "dewy" NOT matte finishing spray to lock in your application and still have a fresh youthful glow. I recommend a tinted moisturizer only in summer months and a setting spray again in "dewy". This will prevent overly clogged pores and summer breakouts. Make sure whatever you're using has at least an SPF of 10 or higher! 3) Frosted Lipstick. No. Just please don't. Please. In fact if you show up for a portrait session with frosted lipstick on I will actually hand you a tissue and ask you to please wipe it off. I'm doing this because I care, and I like you. 4) "Scouse Brow". This is a term used by the British to describe overly darkened brows. To properly darken your brows select a shadow or pencil (matte of course) that is one shade LIGHTER than your NATURAL hair color. For Chelsea in the photo above I used just a shadow... Urban Decay's "Buck" found in the original Naked Palette to fill in her natural brow line and extend it down to meet the reverse cat eye. This frames her face and accentuates the eye without aging her appearance. 5) Cool toned lipsticks. These are lipsticks with color bases in the blue family. They look good on no one. If you don't know how to tell the difference, ask someone at a make-up counter to assist you. They may be able to recommend other brands even if you're unable to throw down $18-$36 for a lipstick. A good lipstick however is worth the investment, if only you FEEL prettier - you'll look younger too. 6) Messiness. Make sure you're in order when you've got a full face of make-up on. Practice a few times prior to your session with your application and experiment with products or colors that you typically wouldn't. You want to look like yourself for your portrait, only better. Giving yourself a proper once over correcting little smudges that occur over the day also ensure you're looking your best. |
Elle HallsDESIGN TALK Archives
July 2023
Categories
All
Mailing list: |



 RSS Feed

