Outdoor sessionsMinnehaha falls One of my favorite places to take photos in the winter time is in the ice caves at Minnehaha Falls. You're not really supposed to be in the ice cave - which is the falls fully frozen... but I'm not afraid of a little trespassing in the name of Art. If you aren't either I'm game to capture you in this incredible if not other worldly spot. Just be prepared, there is quite a hike prior to getting to the cave and it's going to be muddy. Boots that are waterproof are best for this adventure. I learned this the hard way! http://www.minneapolisparks.org/?PageID=4&parkid=252 The Landing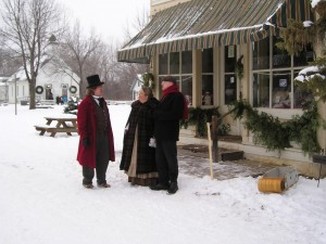 A classic and nostalgic spot for outdoor winter portraits is The Landing formerly Murphy's Landing in Shakopee just past ValleyFair on Highway 101 which is part of the Three Rivers Park District. Most Twin Cities natives will have taken a field trip here at some point in Elementary School to discover how the pioneers spent their lives. If so you'll be surprised if you haven't visited in awhile. This true to life pioneer settlement is complete with log cabins, school house, and town. The view over the Minnesota River Valley is incredible. The Landing admission is FREE! I recommend visiting during one of the Holiday events. You'll really enjoy it, and of course lunch in downtown Shakopee just a few minutes away. http://www.threeriversparks.org/parks/the-landing.aspx The minnesota landscape arboretum The Minnesota Landscape Arboretum offers several different outdoor spaces and gardens, even in the dead of winter to capture some beautiful images. My favorite engagement shoot was shot here in the Spring and the photos turned out amazing. There is a fee to enter, $12 per person ages 13 and up. However every Thursday is FREE until March! The Arboretum closes during the winter at 4:30 pm. With trails and even snowshoeing available during the winter this is a great spot to be photographed or spend a snowy afternoon in the outdoors. http://www.arboretum.umn.edu/directions.aspx indoor sessionsThe Minneapolis institute of arts The Minneapolis Institute of Arts or the MIA allows anyone to photograph in the galleries. In fact, they encourage it! The bonus of shooting in the gallery is that it is perfectly lit. No flash is allowed, but you don't really need it anyway. There are lots of different areas to get some great photos, and you can spend the day - FREE of charge viewing some really beautiful artwork. There is a little cafe, and a gift shop with loads of unusual items. The MIA is located in the heart of South Minneapolis, with a park located right outside its doors. This way you can get some great indoor shots, and some great outdoor shots too! I really love this gallery. You can't beat the price, and its a great way to spend an afternoon. The gallery is closed on Mondays, and I recommend if you would like to be photographed here doing so during the week either Tuesday or Wednesday. http://new.artsmia.org/ The Como conservatory The Como Conservatory is another wonderful location for photography. With free admission (recommended donation of $5) it fits the budget and is an oasis in the dead of winter. They are welcoming to people taking pictures as long as we do not take up walkways or hinder the mobility of others enjoying the botanical gardens. Tri-pod photography isn't allowed and with low lighting this is going to be an early daytime location. This location is best for photographing only one or two people. Modeling editorial style shots or an engagement session would be perfect here. http://www.comozooconservatory.org/ Studio C7, Saint Paul Studio C7 is an hourly photo rental studio with wonderful Northern light. I run my own business out of the studio and have made it available to anyone looking to create indoors. There is a changing room, sink, fridge, and other amenities in the studio. Check out the website here for additional hourly rental information. www.studioC7.weebly.com I hope you found these locations inspiring, and will give you the confidence to take on a winter photo shoot! They can be really quite whimsical and romantic!
Please feel free to email me any questions at [email protected]
3 Comments
 I spend a lot of time editing photos and one of the things I spend the most time on is.... whitening teeth. I can get your teeth so pearly white that your teeth gleam like a Hollywood actresses. Your photos look awesome, but what happens when you meet someone for the first time? What about a virtual connection, person whom you connected with via LinkedIn and your teeth in reality don't look like your profile picture? I bet it's safe to assume that the person you just met may wonder what else you've been less than honest about. Avoid this situation all together with a few dollars and a couple of weeks of cleaning and whitening. You won't regret it. I found Kandee Johnson a couple of years ago and I love her tutorials. Check out the tutorial from Kandee below on how to whiten your teeth for less than $10. I've been using this method for awhile and my teeth are white, and not overly bleached looking. Don't forget to brush AND floss twice a day!  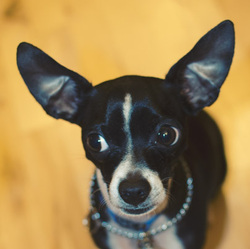 Charlie looks apprehensive about this but I found a guilt free recipe for turkey meatloaf today and since its already space heater and leg warmer season I decided it would be just what the doctor ordered... And for a side dish? Stick to your ribs Mac and Cheese made with whole grain shells, Velveeta, coconut milk, and coconut oil with a sprinkle of bread crumbs on top. Mashed potatoes? Of course! But make sure they're sweet potatoes, with just a touch of Irish butter. A low calorie alternative to traditional mashed potatoes with butter and cream. So if you're still interested see the recipe below for my new favorite guilt free comfort food... Turkey meatloaf, in a crock pot! Lets get cookin'! 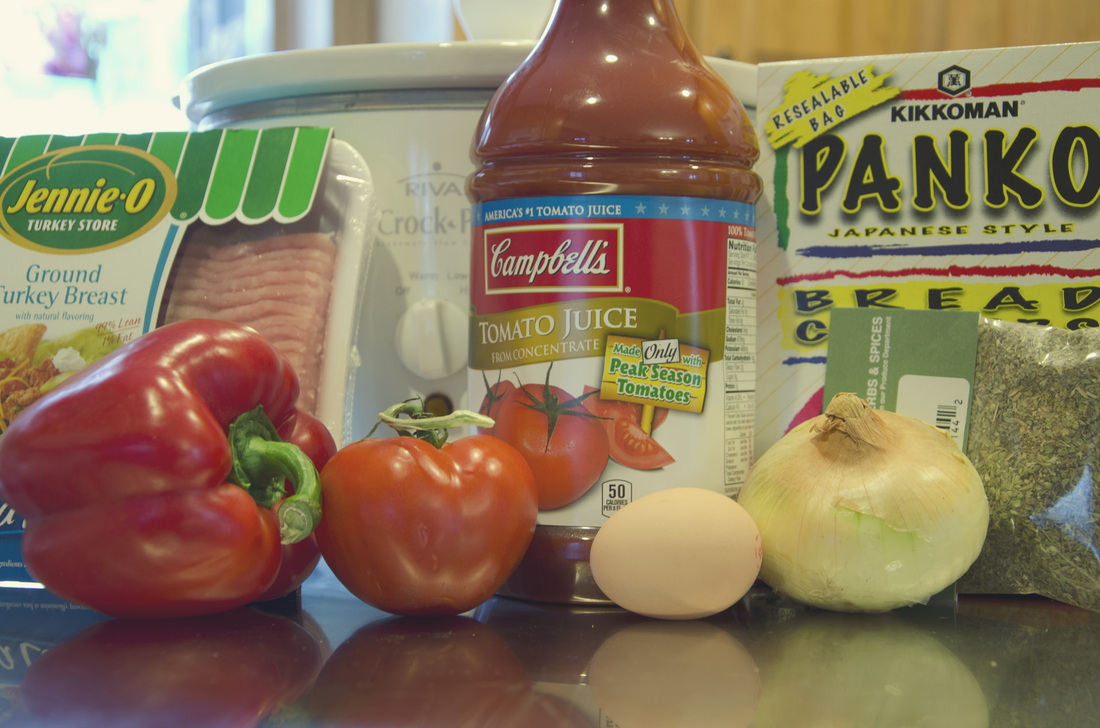 Guilt free turkey meatloaf What you'll need: 1 pound lean ground turkey (or chicken or beef - just try to keep it at 93% lean to ensure calorie count is accurate) 1 egg, beaten 1/2 cup yellow onion, diced 1/2 cup red pepper, diced 1 cup whole grain or panko bread crumbs Pink Sea Salt, to taste 1/2 tsp cracked pepper 1/3 cup tomato or vegetable juice 1 tsp oregano 1/3 cup high fructose FREE ketchup, set aside until the last 30 minutes of cook time. Slather that richness on! 1/2 cup tomato, diced and set aside... sprinkle on top of ketchup once meatloaf is cooked Crushed red pepper, to taste Franks Red Hot, to taste (once finished cooking, I could drink Franks...) Putting it together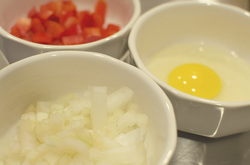 There is a little work that needs to be done to execute this recipe, but its really quite easy and assembly took me a whopping 20 minutes including dish washing time. Start by dicing your veg and setting aside. Give the egg a spin, like you were going to prepare a nice omelette. Don't beat it too long, they don't typically like that. 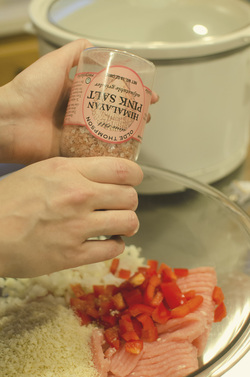 Get out a large bowl to mix your ingredients together in. The fun part about meatloaf is mixing it with your hands. Wash them first, and take off your rings if you don't want to be picking dried meat out of them later. I've made this mistake in the past. It was pretty gross. I like to take my meat and throw it into the bowl first, mostly because I am not a fan of its color and texture... After adding your meat to the bowl, start adding in your dry ingredients. Breadcrumbs, diced onion, diced pepper, sea salt, pepper, oregano, and crushed red pepper (optional). Next just throw in your wet ingredients, you're going to be pulverizing this recipe by hand so it doesn't matter really either way how you incorporate this stuff. I just find it easier. Add in your tomato juice, egg, and Franks Red Hot sauce (optional). Mix it up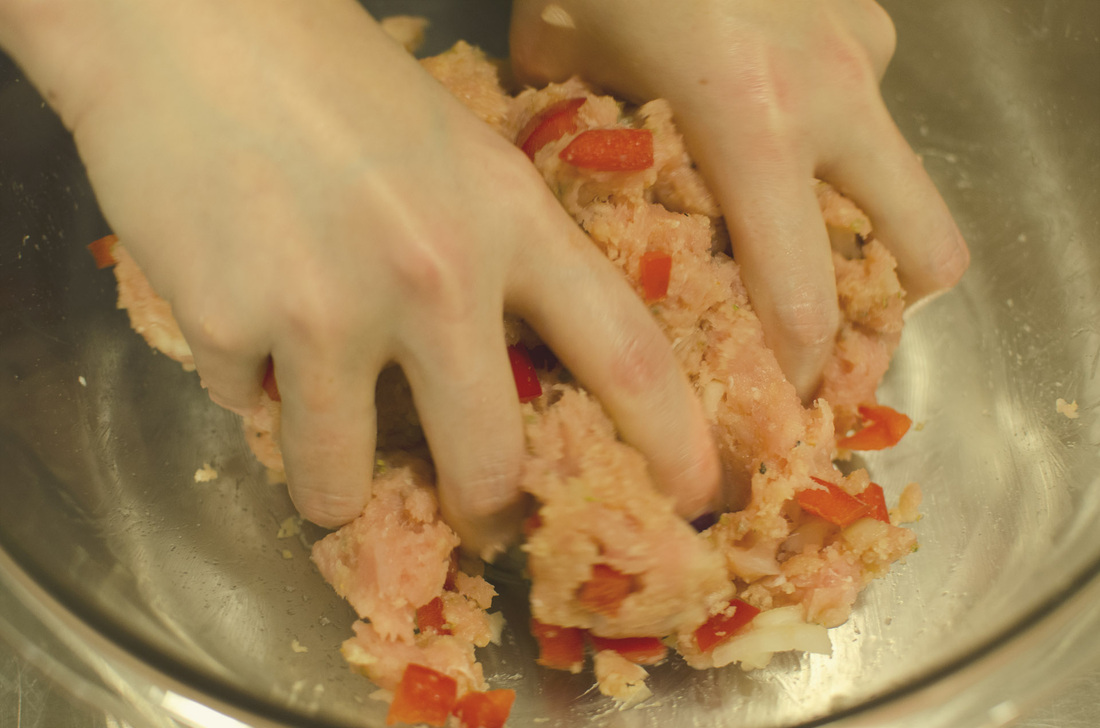 Once you've added everything to your mixing bowl you can go ahead and get started on mashing it all up! This is the fun part, gross but fun. Don't forget to wash your hands with hot water and soap when you've incorporated all of your ingredients - especially if you've added Franks and crushed red peppers. Salmonella poisoning doesn't sound all that fun either. cooking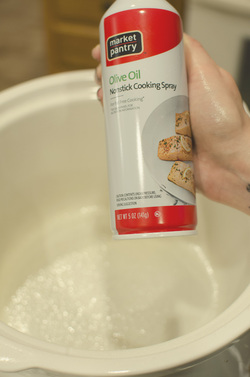 Next up, prepping your crockpot and cooking your meatloaf! I use spray olive oil to coat the sides of my crockpot to prevent sticking upon removal. Another little tip is to take strips of foil and make a criss cross shape, this way you can grab the foil once cooking is finished and just lift your meatloaf out of the pot. If you are wanting to keep this a low calorie recipe I would refrain from using shortening, butter, or regular vegetable oils to coat your crockpot. I always use either olive oil or coconut oil for this, coconut oil will give your food a sweet taste once its cooked. To avoid this use olive oil or even grape seed oil. Grape seed is a great high heat oil, and can also be used for baking, skin moisturizer, eye make-up remover, and a lubricant. It's high in vitamin E so slather that on your dry skin in the winter months if need be and your skin will love you for it. Alright, back to meatloaf... 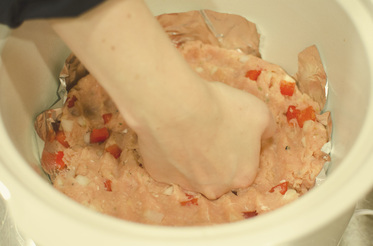 Take your ingredients and beat them into submission. Well, take the seasoned meat and form it into a uniform layer at the bottom of your crockpot. As you can see I added two strips of foil underneath my meatloaf, and it was very easy to remove. The fats don't really have anyway to escape either so it should be that hard to remove the loaf without the foil. Have you ever had a meatloaf in the oven boil grease all over? Me too. Not in the crockpot! 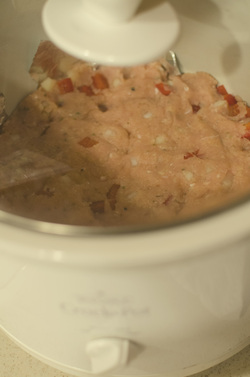 Once you've got everything situated in your crockpot cook your meatloaf for 4-5 hours on low. About 30 minutes before you finish cooking your meatloaf add your 1/3 cup ketchup to the top for final cooking and seasoning. When you've served up your loaf add your diced tomatoes to the top. They really don't do much for the dish other than make it look a little pretty, but I'm all about presentation. Make sure your meat is cooked to 165 degrees, if you don't have a meat thermometer push down on the middle and make sure the juices are running clear. Meat thermometers are really inexpensive and handy for a lot of things... I highly recommend one. Voila! Your loaf is done. And I hope delish too. Please leave a comment if you make this and let me know if you've modified the recipe. Yields 6 servings, calories 184 a serving, total fat: 4g, Trans fat: 0, Sodium: 294mg, Sugars: 11g, Protein: 18g www.skinnyms.com/slow-cooker-turkey-loaf.com  Now enjoy the other "meatloaf"  You've decided to book a photo session for your family. You want to commemorate the year and who you are with a beautiful boutique image. But what to wear? I am not a proponent of matching outfits as pictured. To me this is a dated, if not silly look that makes the photo less about your family and more about a ridiculous matching shirt. If you decide to dress alike in your portrait session, you will no longer appear to be individuals within a family. Yes, it will be easy to identify you as a "family unit" but you are most likely issuing these photos to people who know you. Don't give them a reason to tease you during Thanksgiving dinner. Instead of one matching family outfit... I recommend outfits with complimentary colors, that exemplifies your personal style. Be yourself, you are already unique without the matching shirts. Inspiration for styling your Family Portraits, Fall 2013Menswear: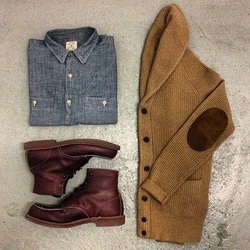 For men think, classic tailored pieces that are either new, or vintage. Vintage shopping can be light on your wallet, leaving you a little extra money for tailoring. Why tailor a shirt or jacket? Because it will fit to your body only. Ready to wear items found on the rack are generally sized. If you're spending money on a jacket that isn't trendy but something you will wear for several seasons tailoring it to fit you ensures it looks absolutely perfect on you. You will look polished, and professional. Chambray shirts are big for 2013, but I do not recommend pairing it with jeans. Flat front Navy pants are always flattering. Pleated pants, if still in your closet should be donated. They do nothing for the frame of the body, male or female. Press your shirt and pants but only use light starch. Pleating your pants and shirts will make you appear rigid or stiff. You want to be comfortable, and look relaxed and natural. I recommend boots if you're wearing jeans for your session. Dress shoes won't match your jeans, and sneakers are too casual. For the ladies: Women's fashion can be tricky. There are many more options offered to women, and this can actually set you up for making more mistakes in planning your portrait outfit. The first rule should always be "Be Comfortable". Once your feet start to hurt, no matter how hard you try - your face starts to show it. If you're not wearing 6" heels daily already opt for a more comfortable heel height or a fashionable boot. Your feet and family will thank you for it! Wear a color that is complimentary to everyone else's outfits. A pop of color is great! Keep it a solid color that again matches the tone of everyone's outfits. Monochromatic shades of red and burgundy look great with browns and blacks. Orange is one of my favorite colors for fall, paired with jeans. A classic color scheme is tans and ivories with your jeans and looks great in photos! 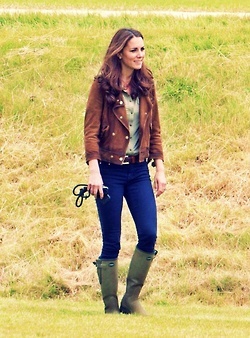 When in doubt look to Kate Middleton. Her style is classic, and elegant. She is always polished and poised and wears things that photograph beautifully. Her clothing fits her appropriately and is tailored to her frame. Most dry cleaning shops will have someone who for a very small investment will take in, hem or correctly size any item of clothing. Even an off the rack jacket can look couture - the difference really comes from the tailoring. Kate's hair is always simple and unpretentious. Loose curls and a side part is really all you need for portraits as well. Keep makeup clean and fresh. Make sure to darken your brows, but if you don't have experience with doing this yourself skip it. A professional make-up artist is always recommended and I work with several so if you are interested in having this service provided for you please ask. I hope from these examples, tips, and tricks you will be comfortable and confident in choosing the best outfit for your session day. Style consultations are always free and I welcome questions about what is and isn't good for your photographs. Please feel free to email any questions you have about what you've chosen to wear! Remember, classic cuts and dresses will never look bad, that's why they're "Classic"!   Preparing to take it all off can be a simple and painless process. In preparation for a boudoir photo shoot the key is proper hydration, plenty of rest, and to moisturize and exfoliate the skin. A mani and pedi the day before won't make or break the final image but it's a great excuse to pamper yourself a little more. Hydration is key for glowing skin any time of the year. The fall and winter months tend to be drier so you should increase your water intake. If you don't know how much water you should be consuming to be properly hydrated the rule according to the Mayo Clinic is this: 2.2 liters or 9 cups for women a day and 3 liters or 13 cups for men. Typically in the winter I drink at least that much water a day and I add in either coconut water or aloe water for extra hydration for the skin. You can tell if you are dehydrated by pinching the skin on the back of your hand. If it snaps back into place, you're hydrated. If it doesn't, you need to grab a glass of water. Dehydration is bad for beauty because when you are not consuming enough water, the body pulls water out of your largest organ.... the skin. Once your skin drys out it can begin to wrinkle. Your skin is like paper, once you crumple a sheet of paper its nearly impossible to smooth it out and have it appear how it originally did. Every company that sells miracle creams will work hard to convince you that if you slather something on top of your skin you will save yourself from the inevitable aging process when in reality the only way to truly hydrate your skin is from the inside out. Learn to love water, and put down the diet soda. Add a little lemon, cucumber, and mint to your water for flavor and detoxification. You will look amazing and feel great too! Sleep makes all the difference in how refreshed you feel and look. The average American woman sleeps between 5.9 to 6.1 hours a night. The recommended amount we all know is a solid 8. To look refreshed you should be getting that 8 hours a night. (If you're me its more like 10) So how do you get more sleep? Well, if you have a night time routine start it a little earlier. Try 15 minutes of quiet meditation to calm the mind from the days activities before bed and to help you drift off to dream land. Don't sleep with the TV on or any glowing blue lights in the room. Mobile phone chargers can be a culprit of this indigo glow - which will actually make it harder for you to sleep. There are non-addictive sleep aids to help you too, and I don't mean anything you would buy from a pharmacy. Melatonin is a great sleep aid, is found in the vitamin isle and is drug free. But I find that the best sleep aid is exercise. Go for a walk or do other night time activities to tire you out. It can be fun, and you'll be refreshed in the morning. Moisturizing. I know I just told you that no amount of creams will hydrate your skin, which is true but adding a little topical cream will keep you from looking ashy the day of your boudoir session especially if you've been slamming those diet sodas again. I try not to apply any conventional creams or lotions to my skin which can carry and contain numerous toxins and parabins and can actually cause cancer, dry your skin out more, and cause premature aging. So what's a girl to do? I make my own exfoliant and I use natural, organic, cold-pressed oils to clean and moisturize my skin. Yes, I said oil to clean the skin. (I'll create another post just about that) My favorite oil for moisturizing is Organic Avocado Oil. I use this on my face, neck and entire body. Avocado Oil has anti-aging and restorative properties and my skin never feels greasy or dry. Plus my make-up doesn't slide off when I apply it over the Avocado oil. Exfoliation is self explanatory, but don't run out and buy a $20 jar of scrub when you can quickly and easily make your own right at home! This way you save money, and can control what you're applying to your skin - which will also be absorbed into your body. My general rule is "if you can't eat it, don't put it on your skin". Follow these simple tips and not only will you look great, but the recipe and directions for sugar scrub I've posted below makes great hostess or Holiday gifts. Enjoy! Sources: http://www.mayoclinic.com/health/water/NU00283 http://www.livescience.com/888-americans-sleep.html Buy: Dr Adorable: http://yhst-128882917116537.stores.yahoo.net/info.html *I have no affiliation with Dr Adorable nor am I sponsored by them. I just really like their products!  |

Elle HallsDESIGN TALK Archives
July 2023
Categories
All
Mailing list: |
 RSS Feed